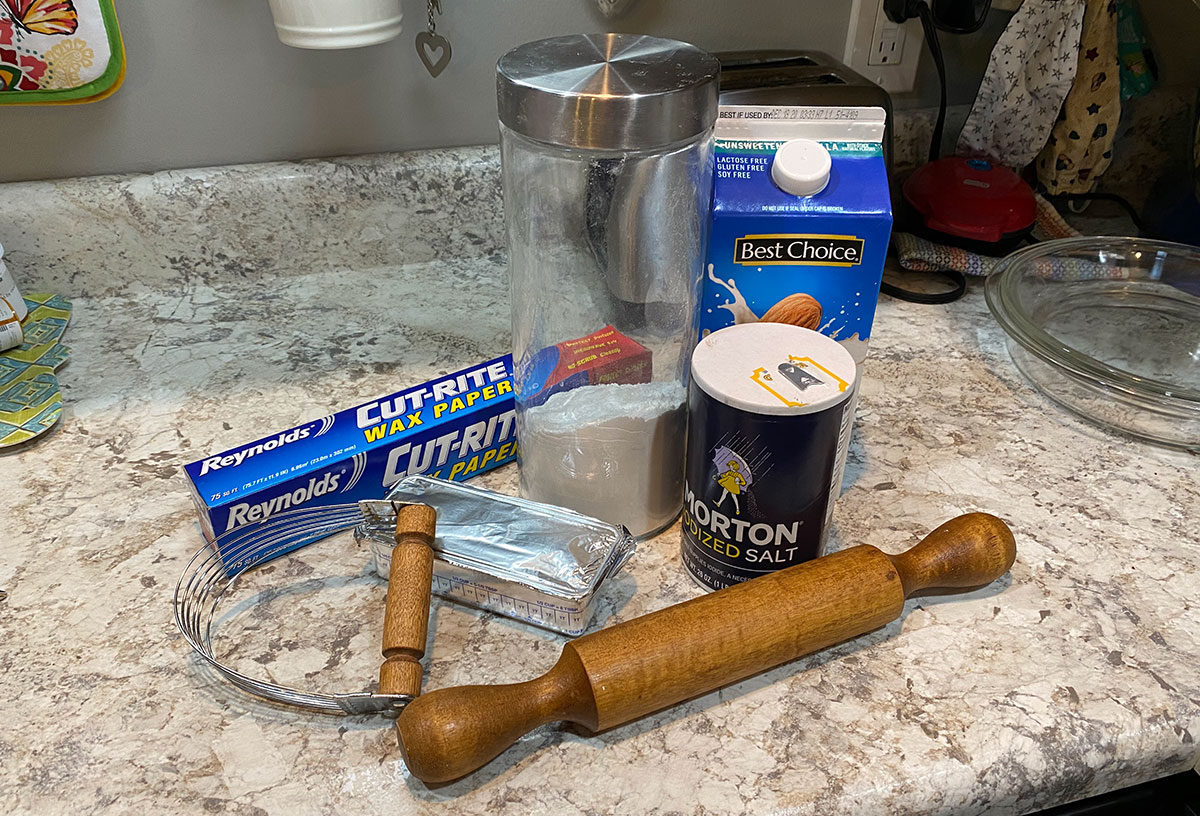
- Combine Flour and Salt
Sift together the flour and the salt in to a large bowl.
- Blend in the Shortening
Add the shortening to the large bowl and blend into the dry ingredients with a pastry blender (or fork). Keep mixing together until the mixture begins to create pea-sized clumps.
- Add Milk
Add milk to the mixture and keep blending. Add the milk a tablespoonful at a time. You want the dough to just start to combine into big clumps and be able to just start to stick together when compressed.
- Divide and Rest
Divide the dough into two equal sizes (if making the double batch). If you are making a pie crust with a top, you'll want to make one portion of dough slightly larger for the bottom and one slightly smaller for the top. Form the two portions of dough (or the one, if making a single crust) into round disks. Wrap in plastic wrap and chill in the refrigerator for at least 30 minutes. (Note: chilling the dough is only a recommendation. Both mom and grandma seldom do this and their dough is perfect every time.)
- Roll out the Dough
When you're ready to roll out the dough, lay a large sheet of wax paper down. Place the dough disk in the center (if doing a double crust pie, roll out the larger disk first as it will be used for the bottom). Place another sheet of wax paper on top of the disk and roll out the dough until it's about an inch or so larger than the pie dish.
- Flip into Pie Dish
Remove the top piece of parchment paper. Next, place the pie dish, upside down, in the center of the rolled out dough. In one swift movement, reach under the bottom piece of wax paper and flip everything over and allow the pie crust to gently fall into the dish. Slowly and carefully, peel the bottom layer of wax paper (which should now be on top) away from the crust. Gently press the dough into the dish making sure it evenly covers the bottom and gets into the sides completely. If the crust tears or a whole opens, simple pinch it back together or use a scrap piece to patch it.
- Form the Edge
This is showing how to bake a single crust pie. At this stage, you'll want to take the edges of the crust that is hanging over the sides and fold it up and under. After that, you can decorate the edge however you'd like. Grandma and mom usually use the classic style of index finger pressing on one side of the dough against the index finger and thumb on the other side. Go all around until the whole crust is decorated. Chill the crust again while you heat up your oven.
- Fill and Bake!
Next, fill the crust with your filling of choice and then bake according to the directions of your filling recipe. This crust usually cooks perfectly BUT if you want to ensure you don't have a soggy bottom, preheat a cookie sheet in the oven and bake the pie directly on that. It will help the bottom of your pie crisp up. It's also great for catching any overflow of pie filling.


