Share this:

Ingredients

  • 1/4 Cup Boiling Water
  • 3/4 Cup Shortening
  • 1 Tablespoon Milk
  • 2 Cups All Purpose Flour
  • 1 Teaspoon Salt

“No-Fail” Pie Crust

An easy pie crust for any type of pie.

20 minutes

Serves: 8-10

Medium

This pie crust recipe is a quick and easy way to pull a crust together and could be used for any kind of sweet or savory pie.

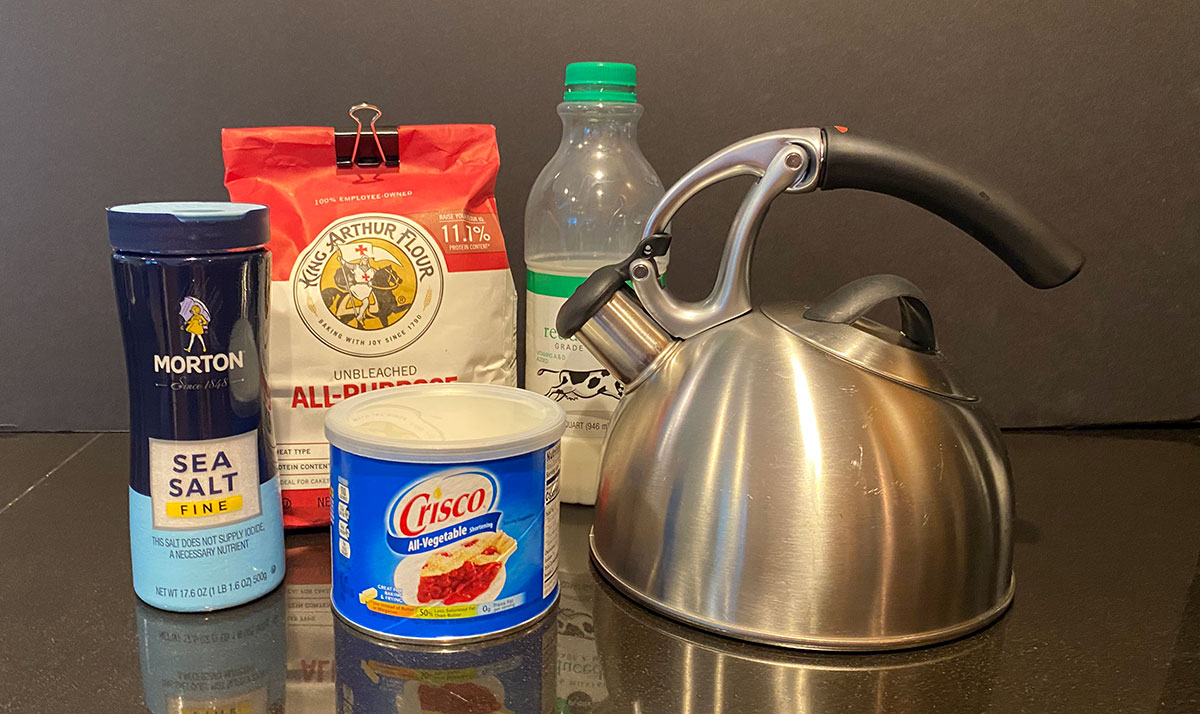
No-Fail Pie Crust Ingredients

This recipe for a “No-Fail” pie crust is a great opportunity to remind everyone and myself why I’m doing this blog. I wanted to take my Grandma Jackie’s recipe box and get it into a digital format for all her kids and grandkids and great-grandkids so we could all have them and share them. It was important to me to go through all the recipes and make sure they were all included. I didn’t want to edit any out. I will, however, be adding more of her recipes that weren’t in the box – stay tuned for that! But I wanted this site to include ALL the recipes that she had kept in her kitchen. Regardless of wether I thought they were great or not. This is one of those recipes.

Grandma was known for her pies and boy, they were a highlight of every holiday when she was making them. As she grew older, my mom took on the task of baking them, sticking pretty closely to Grandma’s way – especially with the crust. When I came across this recipe card I thought maybe this would be a gem! I knew it wasn’t Grandma’s traditional recipe but it’s called “No-Fail.” How could it be bad? Well, when I texted Grandma a quick question about it, I got my first indication that this wasn’t going to be so great. “Oh I don’t think I used that recipe very much,” was what I got back. Uh-oh.

This recipe, while called “No-Fail Pie Crust” is very similar to (if not exactly the same as) a traditional hot water pie crust. In the instructions below, I’ve tried my best to explain how to do it and included some helpful hints along the way. This crust though was VERY dry when it was time to get it into to balls so I added a bit more milk. Maybe another whole tablespoon. You might need to really watch how much flour you add – be sure to measure it properly and very lightly fill your measuring cup. Do not scoop your flour and do not pack it in! And be ready to add another bit of milk if you need it to come together. You definitely don’t want it wet though, so be careful.

With a lot of attention and work, I could get this crust to work and made a pretty decent pie with it. For the filling, I used this apple pie recipe from Epicurious. But I will go back to regular pie crusts and will follow Grandma’s lead and “not use this recipe very much.” LOL If you wanna give it a try though, please let me know how it goes for you in the comments below and share a picture with me on Instagram (@bdhbakes).
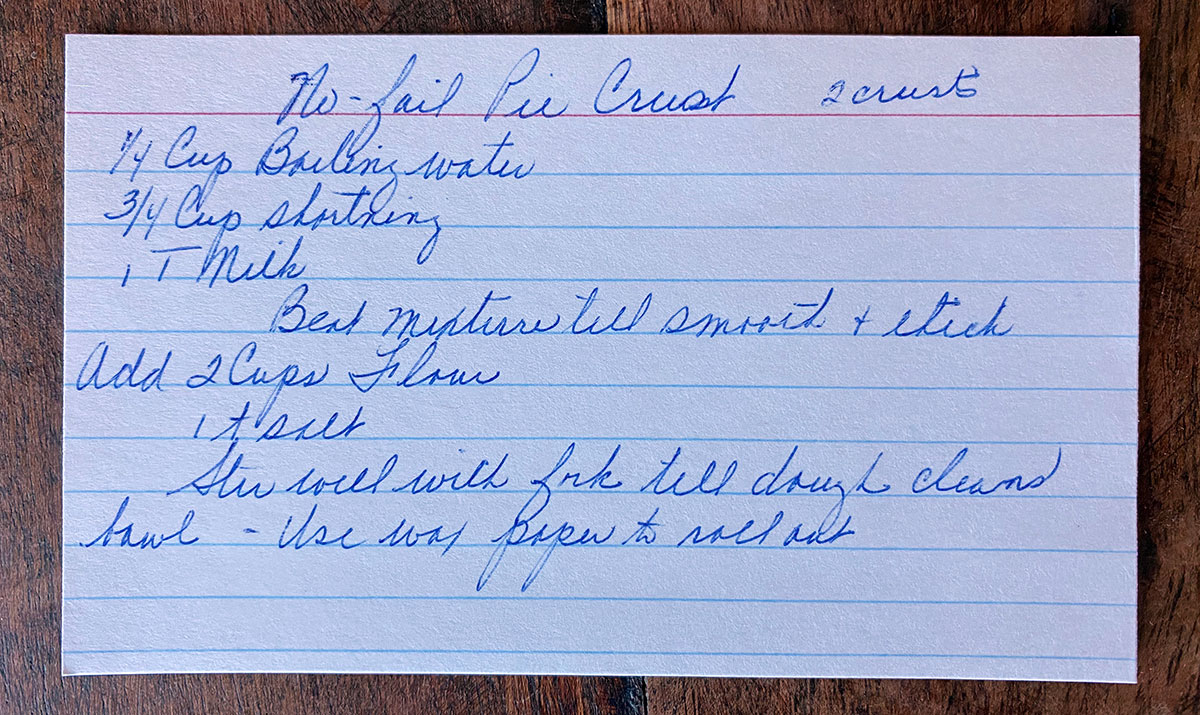
No-Fail Pie Crust Recipe Card

Steps:

  • Boil Water 

    Get a tea kettle or small pot of water boiling. You'll only need a quarter cup so no need to heat much more than that.

  • Add Shortening and Milk to Bowl 

    Put your shortening and milk into a medium size bowl.

    No-Fail Pie Crust Shortening & Milk
  • Add Water and Mix 

    Once the water is boiling, pour out 1/4 Cup and add it to the shortening and milk. Mix with a handheld mixer until thick and creamy.

    No-Fail Pie Crust Add Water
    No-Fail Pie Crust Mix Until Thick
  • Combine Flour and Salt 

    Combine your flour and salt in a separate bowl and whisk to combine. Then, add the flour and salt mixture to the shortening mixture from Step 3.

    No-Fail Pie Crust Combine Flour and Salt
    No-Fail Pie Crust Add Flour to Shortening
  • Blend with Fork 

    With the flour added to the shortening, blend all the ingredients with a fork. You could also use a pastry blender. Blend until the mixture looks like gravel.

    No-Fail Pie Crust Blended Dough
    No-Fail Pie Crust Dough Texture
  • Form Disks 

    Now dump your crumbly mixture onto your counter and press to combine. Don't over work or kneed - you want to just combine the ingredients until they start sticking together. You may need to add some additional milk or water at this step, but only add a small amount at a time. Split the dough in two and form two evenly sized disks. (If you're making two pie shells, the disks should be very even. If you're making one pie shell and one pie lid, be sure that one ball of dough is slightly larger - that's your bottom shell.)

    No-Fail Pie Crust Dough Balls
  • Rest 

    Wrap each disk in plastic wrap and allow to rest in the fridge for at least 30 minutes. The dough at this point can rest in the fridge for several days OR can be frozen for up to six months.

    No-Fail Pie Crust Wrapped Dough
  • Prep Surface & Roll 

    After the dough has rested and chilled, prep your work area for rolling it out. Either use wax paper or a plastic pastry sheet like shown here that has been lightly dusted with flour. If you're using wax paper, you don't need to dust it with flour. For a 9 inch pie pan, you'll want to roll out a circle shape that is roughly 11 inches.

    No-Fail Pie Crust Prepped Surface
    No-Fail Pie Crust Rolled Dough
    No-Fail Pie Crust Bottom Pie Crust
  • Repeat for Second Ball of Dough 

    Now, put the first dough (in the pie tin) back into the fridge to chill. Take the second ball of dough out of the fridge and prepare your surface again to roll out. If it's a second pie crust bottom, roll out exactly the same. If it's a pie crust lid, roll out the crust a little less - about a 10 inch circle.

  • Assemble the Pie and Bake 

    Take out your pie crust bottom and fill with your pie filling. If you're adding a lid, moisten the outer rim of the pie crust with water (or even better an egg wash) and lightly lower the pie crust lid on top of it. Seal the top and bottom doughs together by folding over or pressing together with a fork. Be sure to cut several holes in the lid to vent the pie as it bakes. Wash the entire top of the pie with an egg wash and sprinkle with sugar and bake according to your pie recipe. For this one, I baked mine (on a preheated baking sheet) for 20 minutes at 425º and then 40 minutes at 350º.

Tags:

Comments:

Leave a Reply

Your email address will not be published. Required fields are marked *