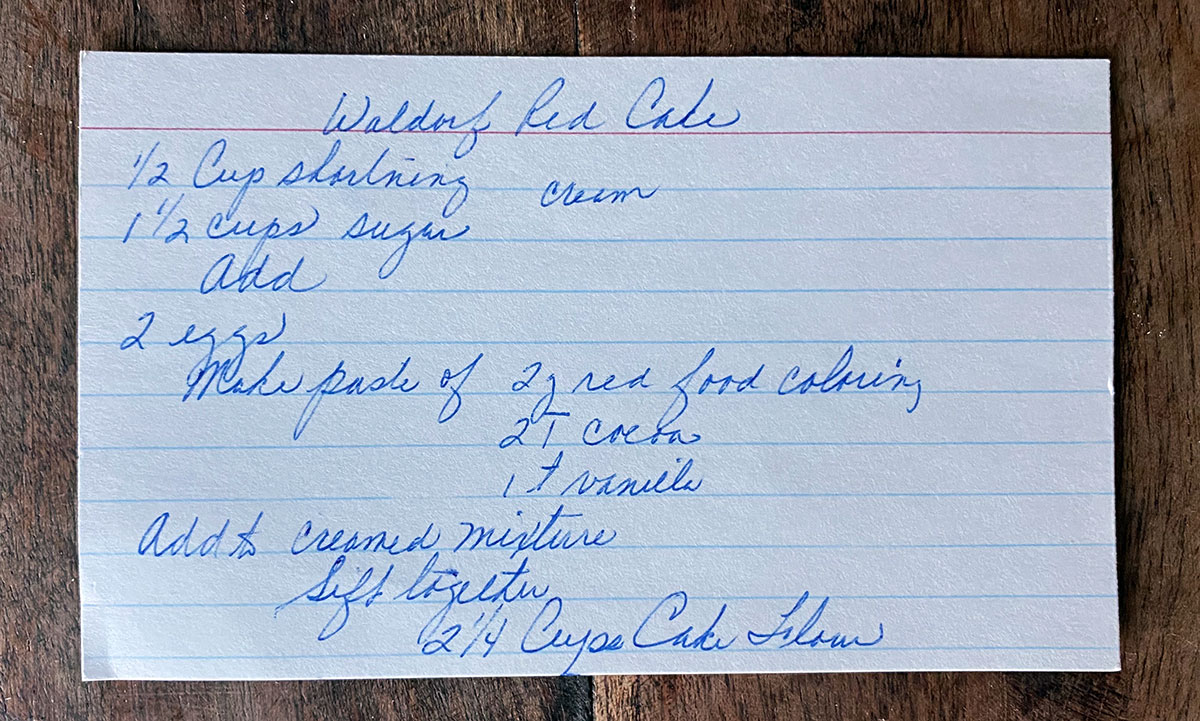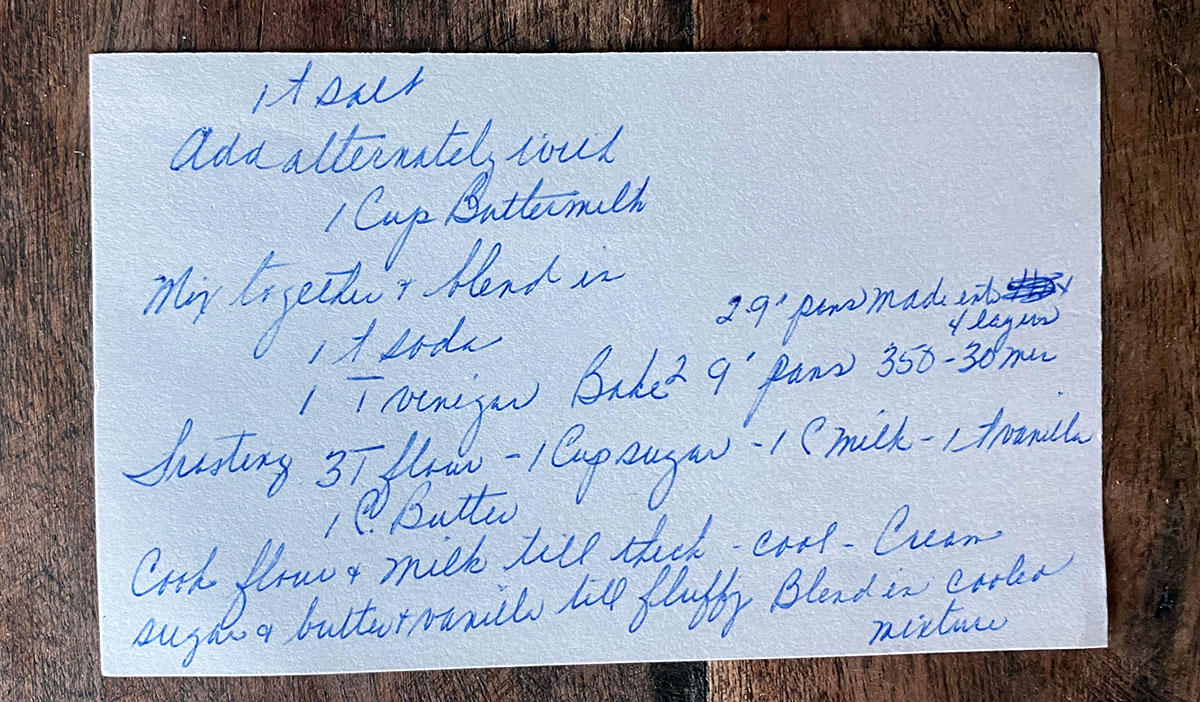
This recipe for the classic Waldorf Red Cake is a big winner! I can remember Grandma and my mom both making this cake quite a bit when I was little. It was always SO good. This cake perfect for any special occasion, holiday or birthday party. It’s definitely a project to make and does require a little skill. If you follow the recipe below though, I’m sure you’ll have great success.
If you’re not familiar with Waldorf Red Cake, it was the precursor to the infamous Red Velvet Cake. Much of the recipe is the same and you can see from the photo that the end result is almost identical. However, the Waldorf Red Cake does not have traditional cream cheese frosting that Red Velvet Cake does. Instead, the Waldorf cake has what is called a whipped roux frosting. That might not sound familiar to you, but I guarantee, when you taste it you will likely be flooded with nostalgia and be transported back to your 8th birthday party. Or something like that. It’s a great frosting that’s not used nearly enough anymore. Wonderfully sweet, but much lighter than cream cheese frosting, I think it pairs even better with the rich, chocolate of the cake.
The whole history of the Waldorf Red Cake and then Red Velvet Cake is fascinating, and I really enjoyed reading about it at: https://toriavey.com/toris-kitchen/red-velvet-cake-history-recipe/
One important thing about making this cake is that you definitely want to make this on a day that you feel like making sure your kitchen (and yourself) look like a crime scene. Seriously, there is so much red food coloring in this that’s impossible not to get it EVERYWHERE. Just be careful when you’re working with anything that has the food color in it and wash anything that’s touched it in water as soon as you can.
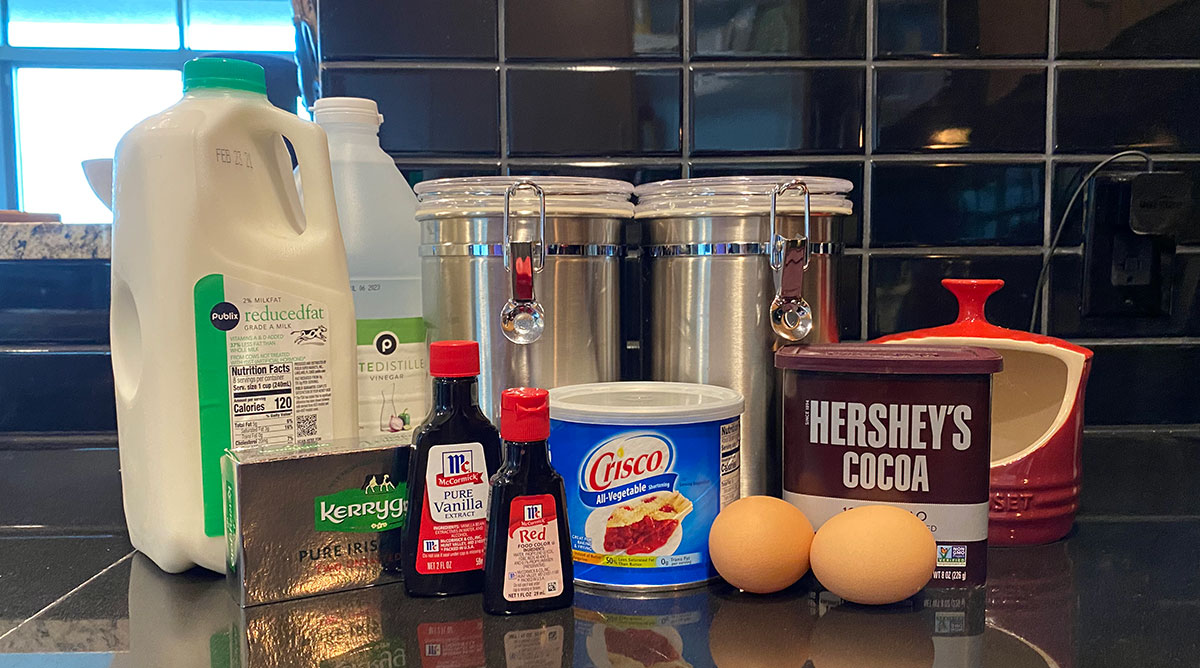
There is nothing I would change about this recipe and I STRONGLY recommend you stick to it. However, there are two substitutions that I used – one out of necessity and one out of preference. I was not able to find buttermilk in the store (they were sold out) and so an easy substitute for that is to get a glass measuring cup and add a tablespoon of vinegar to it and then fill it up the rest of the way to 1 Cup with milk. Stir it well and allow it to sit for 5 to 10 minutes and it should be slightly thickened and ready to use as buttermilk.
Additionally, this recipe call for cake flour which is great, but if you’re limited in storage space in your kitchen or just don’t bake cakes every day, there’s no need to buy a big thing of cake flour for just 2 1/4 Cups. Instead, just take your 1 Cup measuring cup and put in 2 Tablespoons of cornstarch and then fill the rest of the cup with all purpose flour. Voila – you now have a cup of cake flour. For the additional 1/4 Cup you need, just fill the measuring cup with 1/2 Tablespoon (or 1 1/2 Teaspoons) of cornstarch and then the rest with all purpose flour.
I seriously hope you make this cake and enjoy it as much we do! If you give it a try, please let me know how it is in the comments or share a pic with me on Instagram (@bdhbakes).


